Step by Step Guide on How to Remove Shower Head Units

How to remove Shower Head Units.
Learning how to remove shower head units without damaging anything requires that you know how to do it right. It’s so easy to shred the screw threads or damage the nozzle in such a way that you can’t use another shower head again.
I know the frustration that you can feel. There’s a lime build-up, rust, and corrosion that makes removing the unit harder than it should be. This guide helps you by breaking down the steps you should follow. You’ll learn exactly what you need to do at every step of the way.
Not only this, but I’ll also give you some tips and tricks to get it done easier. You’ll know all the materials you need and any tools too. My goal is – by the end of the guide – to have you fully equipped and prepared to remove the shower head yourself. You’ll be able to do it without doing any damage to yourself, the shower head, or the mounting unit.
You’ll be back to having awesome high-pressure showers in no time. Let’s get into the guide!
Step by Step Guide on How to Remove Shower Head Units
I’d love to be able to answer this question in just a couple lines – but like most DIY projects, it’s often more complicated than it seems.
There are different types of shower heads, different connection types, and sizes and different methods used to attach the shower head.
You also need to consider that some people use add-on attachments like water savers and devices that prevent lime build-up.
These are all things that need to be considered to properly provide a solution.
This section will break down the steps involved in removing different types of shower heads (old ones, those with attachments, etc.) and what you need to be on the lookout for. Each section will lay out the tools and products you’ll need with you before starting.
Let’s go!
How to Remove Old Shower Head Units
This is perhaps going to be the most common shower head that needs to be removed. People eventually renovate – and when they do – they come across tons of old and out of date items around their house.
If your shower head is old or has been used for a long time, this section is for you. Here are the tools you’ll need before getting started:
- Wrench or adjustable pliers
- A rag cloth
- Some gloves if you want to protect your hands
There are two methods you can use here, so I’ll start with the easier one.
Method 1: Remove the Shower Head by Hand

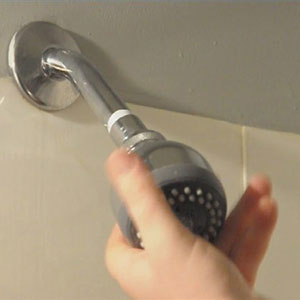
This is by far the easiest and fastest method. It’s excellent when learning how to remove shower head without a wrench or pliers.
This might vary slightly depending on the specific setup you have going, but the general process and directions should all be the same.
Here Are the Steps You Should Follow:
- Grab the shower head with your stronger hand (this is the one that does the turning)
- Depending on the design, you might need to grab the connector nut
- Manually unscrew the shower head (counterclockwise)
- It should give and start to unscrew
- If you need extra leverage, grip the shower pipe and hold it in place – just make sure not to bend or distort it
That should be enough for most people learning how to remove old shower head units. If this doesn’t work, it means the unit was put on with tools; so you’ll need tools to remove it.
Method 2: Using the Wrench or Adjustable Pliers

Here Are the Steps You Need to Follow, along with the Required Tools Listed above:
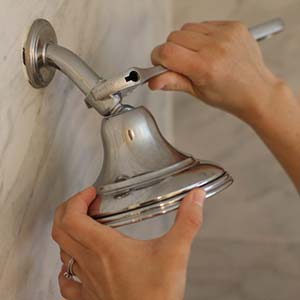
- Use the cloth or rag to wrap around the mouth of the pliers or wrench
- This will protect the head and shower pipe from taking damage
- Adjust the wrench or pliers until they are tight and ready to turn
- Hold the shower pipe in place
- Begin to unscrew the shower head in a counterclockwise direction
This should have successfully removed the shower head without heavily scratching or damaging anything. If this hasn’t worked and the shower head still won’t budge – you’ll need to move on the next section.
How to Remove Stuck Shower Head Units
This is a common problem you might face with our “How to remove shower head units” problem.
Sometimes the shower head gets clogged with corrosion, rust or lime build-up. This makes it unbelievably tough to remove by hand, or even with tools.
If you’ve ever experienced this before then you’ll know what I’m talking about.
Luckily there are some solutions, and this is one of my personal favorites.
Here’S What You’Ll Need before Getting Started:
- Some white vinegar
- A plastic bag to go over the shower head unit and fittings
- Some duct tape or a large and strong rubber band
Once You Have All These Gathered Together, Follow These Steps:
- Pour the vinegar into the plastic bag
- Leave a little free space for fastening to the shower head
- Use the elastic band or duct tape to fasten the vinegar-filled plastic bag over the shower head and connection
- Make sure it’s tight and isn’t going to leak or fall
- Leave it overnight, or at least 6 hours
- When you return, follow method 2 from the above section on removing old shower head units
- It should come off without much hassle
The vinegar helps to break down the corrosion and the lime, leaving you with a clean and unobstructed removal.
You might need to repeat this step as the build-up might be heavy. Don’t stress if it doesn’t work the first time.
P.S. This process will also work if you want to know how to remove a shower head that is glued on.
How to Remove Shower Head without a Wrench
Here is what you need to do if you don’t have a wrench or adjustable pliers on hand. This will be a lifesaver when the shower head is too tight to remove by hand.
Here’S What You’ll Need:
- WD40 or another rust penetrating oil to loosen the joint
- Lime remover or vinegar to remove lime and corrosion
- A wash cloth
- A set of pliers (adjustable is better)
Here Are the Steps You Should Follow:
- Start by removing the lime build-up – you can follow the same steps laid out in the “How to remove stuck shower head units” section above.
- Once the lime is going, use the WD40 oil to loosen up the connection and make it easier to remove
- Leave it for 15-20 minutes (try to get it as much into the threads as possible)
- Tightly wrap the wash cloth around the shower head unit for a better grip
- Use your other hand to hold the shower pipe in place
- Turn the shower head counterclockwise until it comes off
- You can also use a set of adjustable pliers to help you do the counterclockwise turning – though this is technically cheating
The shower head should pop off without too much difficulty. Try to use a cloth that has a little grip so it doesn’t just slide off the shower head as you turn it.
This is a great general method for learning how to remove shower head without tools.
How to Remove the other Parts of the Shower
Here’s a rundown on how to remove the various other parts you find in the shower as you might need to do a total renovation one day.
How to Remove Water Saver from Shower Head Units

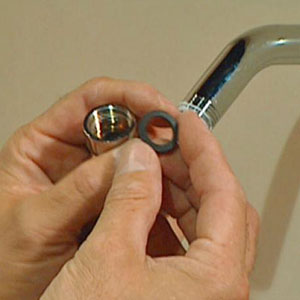
You’ll need to unfold one end of a paperclip. Once you’ve taken the shower head off, use the clip to pop open the section where the black gasket (O-ring) is.
Take care not to damage the gasket.
The water saver is a plastic disc that’s located at the water inlet for the shower head.
Use the paper clip to up-end one side of the disc and carefully repeat the process until the whole disc pops out.
Re-insert the gasket into the same place you removed it from – otherwise, you’ll have water leaks.
Close up the shower head and place it back. If you’re interested in these water-savers, here’s a great read to inform you, and help you save more water!
How to Remove a Shower Head Arm
Here’S What You’Ll Need to Do:
- Start by removing the shower head (use any of the above processes to help you)
- Once the shower head is off, it’s time to remove the shower arm
- Grab it in your hand and begin to turn it counterclockwise (to the left)
- Use a wrench and a cloth if it’s too tight to do by hand
- Repeat until the arm screws out of the wall fitting
P.S. This is the same if you’re learning how to remove shower head pipe pieces.
Final Thoughts
You should be ready to get the tools you need and get to work.
You’re well-informed and prepared – regardless of the specific situation you have to deal with – you’ll be able to work out the solution.
Knowing how to remove shower head units the right way is quick and easy for you. It’ll take a little practice to get right, but you’ll be doing it perfectly in no time!


