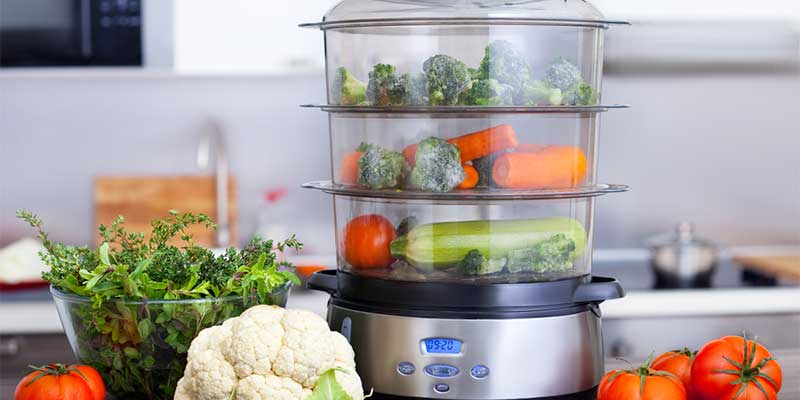
How to use a Vegetable Steamer
To get rid of burnt or undercooked rice, I always love to make perfect-steamed rice. But I find it a bit confusing when there is no perfect appliance but a vegetable steamer around me but I need to steam rice.
If you can relate to my condition, here’s a big escape- a complete guide on how to steam rice in a vegetable steamer.
We have laid out some easy ways to make steamed rice. Also, there’s an FAQ section that will answer the common questions regarding this topic. Also, you’ll find some pro tips to make the best possible steamed rice.
Let’s get started!
When to Steam Rice?
If you have a question ‘when steam rice is the ideal option?’ or, ‘what makes me compelled to steam rice in a vegetable steamer?’ then here are your answers:
- When you do not have a rice cooker, you may hardly make rice (which means you can’t justify the purchase). Or perhaps, you are not interested to add another countertop appliance to your kitchen.
- In case, you do have a rice cooker but the power is out and you need to make rice right now.
- If you want to cook in small batches like 2-3 servings and are not interested in dealing with the leftovers.
- If you don’t want to wash individual dishes because it will kill your time.
Two Methods of Steaming Rice in a Vegetable Steamer
However, steaming rice in a vegetable steamer is nothing much to deal with. Let’s get to know two easy methods anyone can follow and make perfectly steamed rice.
Method 1: Using a Rice Cooking Bowl
 An average vegetable steamer comes with a grid or mesh-style bottom that lets steam pass through, at the same time, holds the vegetable in place.
If you are going to pour rice into the steamer basket, hold on! The openings are usually too big to hold rice while they may be small for some vegetables on the other hand.
So, there’s a risk your rice may fall into the steamer’s reservoir. This is why pouring your rice into the steamer basket is not a good option.
To solve this, there are some steamers having a rice-cooking bowl. This bowl is solid but open at the top. What it means is, this bowl lets the steam enter into the open-top as well as cooks the rice as a sealed saucepan.
Here are the steps you need to follow for this method:
Step 1: Go Through a Measurement
First of all, you need to measure the rice and water. The exact ratio of rice and water is dependent on the type of rice you cook and the type of outcome you wish for.
In general, if you’re cooking the regular long-grain white rice, add 1 part rice to 2 parts water.
Do the measurement and put the rice and water into your steamer’s rice bowl. Then, add a little amount of salt to it.
Step 2: Fill the Water Reservoir of Your Steamer
The next thing you need to do is to fill up the water reservoir of your steamer to its maximum level. Then, assemble the compartments and the drip tray of your steamer in the right position.
Place the rice bowl inside your steamer compartment as well as cover it using either its lid or any other steamer compartment having other foods.
Step 3: Set the Timer
And, now we are letting the rice cook and show its magic. ‘How long is it needed?’ the answer to this question depends on what type of rice you’re dealing with.
15-30 minutes is needed to cook regular white rice whereas others (e.g red, brown, and wild rice) will need about 45 minutes and an hour.
Therefore, set the timer according to the appropriate duration and let the rice cook. In case, your steamer comes with any specific setting to cook rice, use them properly.
Step 5: Test the Rice
After a specific time, open your steamer and check the rice. Make sure you are very careful in this step, otherwise, the escaping hot steam may scald you.
And, what if you find the rice isn’t evenly cooked? Well, in this case, you need to place the lid back in its position and leave it alone. Wait for 5 minutes or more and then check it again.
Step 6: Remove the Rice and Let it Rest
When your rice is well-cooked, get it back from the steamer. Next, let the rice stay untouched and rest for another 5 to 10 minutes.
Once this period ends, fluff it using a fork and get perfectly steamed rice. Now, you’re free to use this rice in any steamed rice recipe you want to go for.
This is all method 1 had to show you.
Method 2: Steaming Rice Directly in a Steamer
 There’s another way around using a rice-cooking bowl- direct cooking in your steamer. Yes, you can steam the rice directly in your vegetable steaming compartment as well.
Following this method is even easier because you don’t have to think much about exactly how much water is needed for the rice.
Because, hence, the rice absorbs as much steam as needed while it cooks.
Let’s get to know the steps.
Step 1: Line the Steamer’s Bottom with Cheesecloth
First, unroll the cheesecloth and then fold it. Do this in a way as it lines your steamer’s compartment with 3 to 4 layers. Next, you have to dampen the cloth a bit as well as press it back into your steamer.
Step 2: Measure and Pour the Rice
When you’re done placing the cheesecloth, take the amount of rice you’re going to cook. Then, pour it into the compartment of your steamer. Spread it around so that it makes an even layer.
Step 3: Fill the Water Reservoir
Now, it’s time to fill the water reservoir of your steamer. Fill it to the maximum level and then set the timer. The time duration is the same for red, brown, white, and wild rice. Once you set the timer, turn the steamer on.
Step 4: Let the Rice Stand
Lift the rice along with that cheesecloth when the rice is ready. Do this job carefully with the corners for handles. Take a bowl and tip the rice in it. No, wait for 5-10 minutes and let the rice stand. After that, you can fluff the rice using a fork or spoon.
That’s that! Now, you can use the rice in any ‘steamed-rice recipe’ you want to.
Ways of Improving the Direct-Steamed Rice
Here are a few extra tips for finessing your direct steamed rice.
- Rinse the rice before you cook for having extra-fluffy rice. When you rinse it, there will be friction between the grains. And, it will form a layer of rice flour. This will coat the grains and become sticky during cooking. But hey, if you’re planning to cook ‘sticky’ or sweet rice (that is supposed to cling), then skip this step.
- If you’re going to cook the Asian sticky rice, it will steam faster if you soak it for a few hours. More specifically, soaking for 8 hours will be good. And, when it comes to Basmati, it’s not necessary to soak it for a while but you’ll find it more fluffy and light if you soak it for at least 1 hour.
- As we mentioned in the last steps of each method, do not fluff your rice until it rests for a few minutes. Yes, your rice is perfectly cooked but the starches in it are still a bit gelatinous and too soft (just like in freshly-baked bread). And, guess what? If you fluff the rice in this situation, there will be a sticky mess. But if you wait for a few minutes, the starches will get the time to re-crystallize which will lead the rice to retain its shape.
Tips to Make Your Steamed Rice More Interesting
- For extra flavor and fragrance, use coconut milk or tea instead of water.
- To get a more pleasant savory taste, use vegetable stock, chicken stock, mushroom stock, or pork stock.
- Add a splash of oil and a pinch of salt in addition to water.
- Add spices, tomato, fried onions, and other flavors according to the cuisine you are going to prepare.
Frequently Asked Questions
Conclusion
And, it’s time to wrap up. Hopefully, we have done our best to let you know how to steam rice in a vegetable steamer.
Following every step as we said will make your job easier and make things less messy. Make sure you keep the measurements right and yes, remember ‘safety first’ while dealing with an electric steamer.
Good Luck!