Installing Chair Rail: A Worthy Investment for Home
Installing Chair Rail – A Worthy Investment for Home.
 If you are willing to add more dimension and give a decorative vibe to your walls, then installing a chair rail is a great option.
But it seems a bit difficult for novice homeowners to make these things happen perfectly.
However, it is easy to install chair rail molding and turn your place into a completely new, stylish one.
In this article, we will cover every necessary point of installing a chair rail.
Without having more chitchats, let’s get straight to the point.
What Is The Point of a Chair Rail?
 Basically, it is a horizontal molding that is designed for protecting your walls from the damages caused by the back of chairs.
People install it around 30 inches above the floor (we’ll talk about what is the standard height for it, later) because most of the chair backs come with this height.
Moreover, people love to install chair rails because it adds an aesthetic vibe to their places.
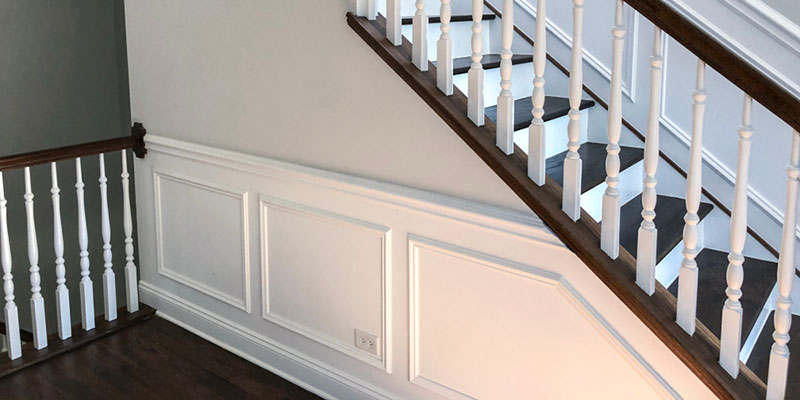
If you install the chair rail or Dado Rail in the middle of your walls and then add wallpaper, wainscoting, or paint to the lower or upper section of your walls, it will look great.
Things You’ll Need
- Chair rail molding
- Tape measure
- Pencil or masking tape
- Nail set
- Level
- Wood filler
- Construction adhesive/wood glue
- Sandpaper
- Caulk
- Stain or paint
8 Easy Steps of Installing Chair Rail
Once you’re done with managing or purchasing the things above, let’s move on to the steps you should go through.
Step 1: Decide How Many Moldings You Need for Chair Rail
 This is the very first thing you need to do, even before purchasing the materials, you need to decide how many molding you do need. To do so, measure and note the length of the walls.
And, this measurement should be at the proper chair rail height. A question is maybe popping up in your mind that ‘what should be the chair rail height?’. Well, it is best to apply the chair rail ⅓ of the way up the wall from your floor.
If you have a room with an 8-foot ceiling, install it at 32” or around this. However, it remains between 30 and 36 inches.
Once you’re done with the measurement, add around 1 foot to the length of every wall- this is to make allowances for mistakes and miter cuts.
Overall, consider these factors below.
- No matter if you are installing it for preventing damage to your wall or just for making the room look better, consider the height of your chairs as well. Why? Because it will bring a unified look.
- You never want to break the chair rails for the window, right? Also, you may not want to place it below your windows. For this, considering windows in the room is also important.
Step 2: Select an Appropriate Molding for Chair Rail
Narrow or wide? Which type of molding do you want? And, how do you want to place it? These depend on your wish and the style of your room. However, choose as you want but it would be appropriate to place it in the middle of the wall.
Moreover, to make your installation easier and look better, keep the molding similar to the trim around your windows and doors.
Step 3: Go Through a Prep Work for Chair Rail
Do you want to wallpaper or simply paint the room before installing the chair rail? If you want, then do it now and make a plan to renew things afterward as necessary.
Now, use a pencil or masking tape to mark the wall studs and their locations. Next, draw a guideline with a measuring tape and level throughout the room at the height where it is going to sit.
What if your floor isn’t level? This is a common scenario in historic or older homes where floors aren’t level and if you install a chair rail here, it may look crooked. To solve this, simply split the difference between a consistent measurement of your floor and the guideline on your wall.
Step 4: Finish the Chair Rail Molding
 Before you install the chair rail, finish it to get a smoother result.
Once you install it and fill the nail holes, apply the final coat.
Before you go for the first coat, use 180-grit sandpaper to sand the chair rails gently and thoroughly.
Be sure the color looks just fine by testing the finish
On scrap pieces.
Step 5: Cope Inside Corners of Chair Rail
 You may notice that your wall corners are not perfectly square. However, it’s easy to cover this issue with coped joints. It can fit tightly against the adjoining piece.
To make it happen, cut the piece at 90 degree (for the one side of the corner) angle on both ends.
Some pro tips to make accurate and smooth cope cuts:
- Keep the saw teeth point exactly toward the handle. It will let the blade cut smoothly.
- To make your copes improve, practice on scraps.
- Cuts will be smoother if your molding cannot wiggle or shift. To make sure of it, clamp your chair rail to a solid work surface.
- Apply light pressure and avoid forcing the saw forward.
Step 6: Test the Outside Corners of Chair Rail
In case, the outside corner flares out, your chair rail will need a cut of more than 45 degrees. The best way to get the appropriate angle is to cut 2 scrap pieces at 46 degrees. And, until the joint is tight enough, keep adjusting the angle of that cut.
Remember to cut both sides at the same angle.
Step 7: Apply Stain to the Molding of the Chair Rail
Staining the molding or applying stain to it? Which one do you prefer? Well, do whatever you want, but apply it before you attach the molding to the wall.
Once you are done, take the first piece of this and apply a construction adhesive or wood glue to the back of that piece. Then, fix it to the wall. Place the bottom edge of the wood according to the guidelines you marked.
Fix each of the chair rail pieces using two finishing nails in one line with each other. When you bring those two ends together, apply some extra wood glue at the joint. To get a smooth appearance, recess the nail heads using a nail set.
Step 8: Finish and Enjoy
 When you’re done with recessing all the nail heads, fill in the gaps or holes at seams and joints using a wood filler.
Gently sand the joints and fillers. Check both the bottom and top edges of the molding and apply a bead of caulk at that.
Lastly, end up with any finish coats or touch-ups if necessary.
That’s that! Enjoy the new beauty of your place!
Also, you may look for some DIY chair rail decorating ideas to spruce the things up.
FAQ’s of Installing Chair Rail
Conclusion
Chair rail plays a significant role to add value to your home. Is installing it still Greek to you? Hopefully, after reading the whole article thoroughly, your answer is no.
We have tried to sum up all the relevant information regarding this topic. And, we suggest you complete the installation carefully to get the best result. Happy installing!


