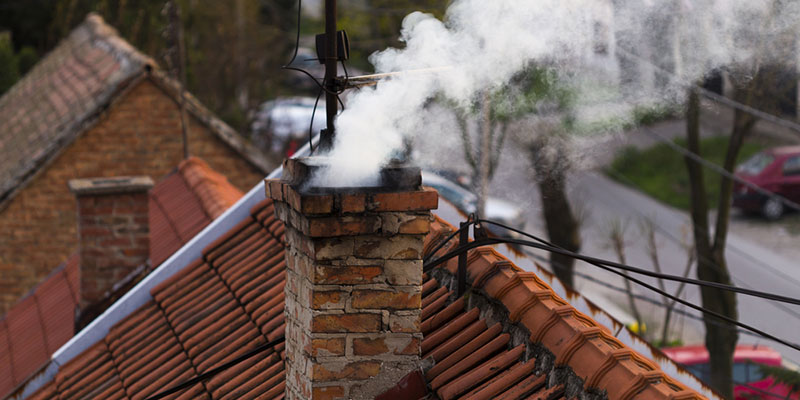
Chimney Cap Installation & Repair
 Thanks to the chimney caps for keeping out rain, debris, and critters and keep your chimney safer by chimney cap repair. But things you will dislike when the chimney cap fails to do its job properly.
It’s crucial to make sure you clean and maintain the chimney cap regularly. And, if things get worse, then you’ll need a guide on chimney cap repair.
Also, choosing the right chimney cap and installing it properly is crucial.
However, this article is going to help you get a perfect solution for chimney cap installation and cap repairing.
5 Steps to Install a Chimney Cap
It’s important to install a chimney cap carefully so that you don’t damage your chimney. To make your job easier, here we have laid out some easy steps, let’s check them out!
Step 1: Prepare Things First
The very first thing you need to do is to get onto the roof using a ladder. Make sure the ladder extends 3 feet above the roof, it will let you climb safely. And, climb very carefully as you don’t lose your balance somehow.
Step 2: Go Through the Measurement Process
Now, you need to find the flue (a metal or clay tube) on your chimney. Generally, it extends out from the top of the chimney. Measure the length and width of the flue using a tape measure.
Don’t take risks of forgetting the numbers, better write down the measurements.
And, point to be noted, in case you have a circular flue, measure the diameter rather than finding the length and width. And, in case, there are multiple flues in your chimney, then use a top-mount cap.
Step 3: Purchase the Right-Sized Cap
 You need to make sure that the cap has the same width and length as the chimney’s flue.
Chimney caps are totally available at hardware stores, so you’ll find one easily.
Remember, a flue that is made of galvanized steel will allow your chimney to have the most protection. So, try to choose one like this.
And, there’s nothing to worry about if you find the cap dimension is 0.5-1 inch larger than the flue, it will fit somehow.
But larger than 0.5-1 inch may not fit properly, so be careful.
Step 4: Place the Cap Over the Top of the Flue
 Now, you are going to install the chimney cap. Firstly, line up the bottom of that cap with the top of the chimney flue. Gently lower the cap on the flue as well as push it down, let it go as far as possible.
Check if there is a minimum of 6 inches between the flue opening and the top part of the cap. Otherwise, the gases and smoke will not be able to vent completely.
Keep in mind that the cap will come with a rim around its bottom. This means you don’t have to place it too low on your flue.
Some of the circular chimney caps don’t fit around outside, they fit perfectly inside the flue. You better push the cap inside the flue and make it feel tight against the sides.
Step 5: Secure the Cap’s Screw Properly
Are you afraid of drilling any pilot holes? Well, don’t be. Because all of the chimney caps come with self-tapping screws. However, you need to feed the screws through every hole in the sides or corners of your cap.
Then, turn them clockwise simply using your hand and dig into the flue. Continue tightening the screws using a screwdriver and make sure the cap isn’t moving or shifting.
Voila! You’re done!
6 Easy Steps of Chimney Cap Repair
Here, we have compiled the easy steps of chimney cap repair. So, get ready for the best things you should know about chimney cap repair- DIY.
Step 1: Prepare Things First.
Before you go to repair the chimney cap, there are a few things to do as manual labor. Go carefully on the top of your top and spread a tarp under the area you are going to work. It will keep you from damaging other parts of the roof while repairing your chimney cap.
Step 2: Pull Out the Cap

Now, it’s time to remove the cap or crown whatever you say. Gently get the broken cap away from the chimney using a chisel and hammer. Remember to start from the outside.
Also, be careful so you don’t damage anything near the flue.
Once you’re done, use a bucket to collect those broken pieces of the cap. Don’t forget to wear protective gloves while you’re handling this stuff.
Use water and a scrub brush to remove any dirt or algae around the crown of your chimney. Also, look if there’s any crack you need to fix.
Step 3: Make a Stiff Crown Mixture
You need to apply a crown sealant to seal any crack or the broken part of your chimney crown. To make a stiff crown mixture, combine water and powdered mortar in a tray.
Remember to add water slowly and wait for the time it gets to the consistency that you need.
Step 4: Apply the Crown Mixture
 Apply the stiff mixture to your chimney using a trowel. Gently spread the mixture out evenly. Don’t rush, go around the entire flue.
However, don’t take too long to complete the job because the mixture may harden if you don’t work quickly.
You can continuously mix the solution using a trowel between the applications.
It will keep the consistency high and the bubbles out.
Leave enough room- 2 inches on the top of the cap because the flue needs to stick up.
Step 5: Slope the Flue
Take enough time to slope the flue and do it in a pyramid shape. And, you should make the slope smooth enough and go from the down to the farthest out of the flue. It will allow the water to drain away from your chimney.
Step 6: Set the Cap
Once the mortar is set or the sealant is dried, set the cap right back into its position. Lastly, make sure you fit the cap properly around the flue. Now, step back and see that you’re done!
Additional Tips for the Maintenance of your Chimney Cap
 You never should overlook the maintenance of your chimney ca. It’s essential to keep it clean and maintain it properly from the very first days. Here are a few tips for the maintenance of your chimney cap.
- It’s important to clean your chimney cap screen using a wire brush, regularly. Otherwise, the screen on your chimney cap can be clogged with debris.
- Try to avoid using green wood/unseasoned wood for a fire. Because it can cause an abundance of smoke.
- Clean any trash, leaves, or twigs from the chimney cap. Otherwise, they can block the air and create abundant smoke.
Conclusion
So, this was all about chimney cap repair and installation. We hope that our information helped you to rub off any of your confusion regarding the topic.
A little advice for you, before we end the conversation, is, do not put off today’s work for the next weekend. Try to clean the chimney cap regularly to avoid any major damage in the future.
Good luck!