How to Remove a Ceiling Fan in 5 Safe and Simple Steps

How to Remove a Ceiling Fan
Learning how to remove a ceiling fan on your own will save you expensive visits from a specialist. Show off to your partner, or test out your one-man-DIY-army skills at home with our easy-to-follow steps.
We Keep It as Simple as Possible.
Our goal is for you to be able to remove whatever type of ceiling fan you have, as quickly and safely as possible. You’ll be able to do this without damaging the old fan or putting yourself at unnecessary risk. We’ll cover the tools you’ll need and when you’ll need them. Our steps are precise and will get the job done.
Let’s get into the guide!
Magical Way to Remove Ceiling Fan
 Before we branch off into how to remove different types of ceiling fans, let’s cover the general steps that’ll likely work for you.
Here Are the Tools You’ll Need:
- Screwdriver or power tool with the Phillips tip bit
- Sturdy ladder
- Allen key set (depending on your fan)
- Pliers
- A trusted friend (if you need the help)
Once you’ve got these tools together, let’s move on to the next steps.
P.S. This process will also work if you want to know how to remove a ceiling fan with a down-rod. Just make sure not to bend the rod at all.
Step 1: Shut off the Power
You either need to shut the power off to that specific room or the whole house. The option you go with will depend on your house and its setup. If you aren’t certain, shut it all off. It’s better to be safe than sorry (excuse the cliché).
Step 2: Unscrew the Fan from the Mounting Bracket
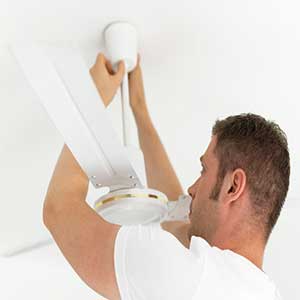
The screws you see at the top of the fan (where it meets the ceiling) are all that’s holding the fan up. They’re connected to a mounting bracket inside. With one hand, support the fan from underneath (be careful not to break the light’s glass housing if there is one).
Begin to remove the screws with the other hand. If you aren’t able to do both at the same time, get a friend to hold the fan while you remove the screws.
Step 3: Remove the Fan from the Ceiling
This should be quick and easy to do. You might need your friend to help you out here. You might have to slide the mounting bowl clockwise to unclip the safety slot. It’s there to prevent the fan from falling once the screws have been loosened.
Not all fans have this. The fan should come off quite easily once you’ve slid it off the safety clip. Have your friend hold the fan while you move on to the next step.
Step 4: Undo the Wiring
The wires are all that’s holding the fan to the ceiling. You need to remove the wire nuts. To do this, unscrew it to remove it from the wire.
Once the wire nut is off, disconnect the wire. It should be very easy to do this. Immediately put the wire nut back onto the wire you removed it from. This will stop the wire from arcing in case the power is accidentally turned back on.
Repeat this step for all three wire nuts, being sure to replace them once the wire has been disconnected.
Step 5: Put the Fan Down and Thank Your Friend
Be careful when putting the fan down. Older fans, especially wooden ones, can be pretty fragile. There’s a chance something could break while you’re holding it.
You also don’t want to put the fan down carelessly as you might break the glass housing for the lights. That’s it! You’ve successfully removed a ceiling fan. Be nice and thank your friend for their help.
After all, they could have sent you flying while you were on the ladder!
How to Remove a Hunter Ceiling Fan
These are very common fans and the process can be a little tricky if you don’t know what you’re doing.
Here Are the Steps You Need to Follow before Removing the Fan.
- Remove the light bulbs and glass shades
- Remove the blades of the fan – they unscrew where they meet the inner iron blades
If the Blades Use the Easy Lock System, Open the Lock and Push It in a Counterclockwise Direction to Release the Blade
- Remove the canopy that houses the screws – this can be done by pulling on the rings with two fingers
Once you’ve done these, you’re ready to move on to the same 5 steps we covered in the “How to remove a ceiling fan” section. These steps will apply here. Take special care to make sure that the wire nuts are placed back onto the wires as soon as possible.
You may need to disconnect some wires directly where they meet the fan. This isn’t always the case, but it’s something you might need to do – depending on your fan model.
How to Remove a Hampton Bay Ceiling Fan
Go straight to the very top of the fan (where it connects to the ceiling). There should be a ring around the part that touches the ceiling. This ring protects the screws.
You need to get a good grip on this ring (use rubber gloves if you need to). Wiggle it side to side while pulling down and it should come off.
Now you’ll have access to the screws that are holding the fan to the mounting bracket.
From this point, you can proceed with the same five steps process from the “How to remove a ceiling fan” section.
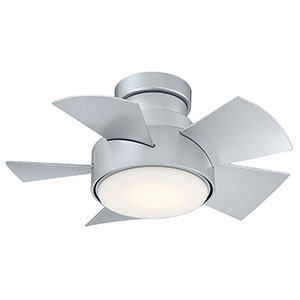
How to Remove a Flush Mount Ceiling Fan
The process is very similar to previous methods.
 You Need to:
- Shut off the power
- Remove the lampshades
- Pull down the decorative cover over the mounting bracket
- Take out the set screws holding the fan to the mounting bracket
- Unhook the motor cover from the main bracket
- Loosen the wire nuts
- Disconnect the wires
- Pull down the main part of the fan
- Remove the mounting bracket from the main box
That’s it! It’s pretty simple and easy to do.
If you want to know how to remove and replace a ceiling fan, these steps in combination with the previous ones will cover you.
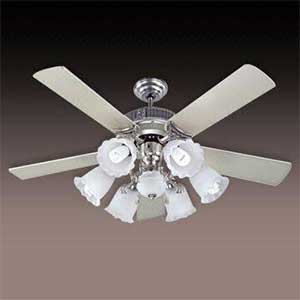
How to Remove a Ceiling Fan Light Kit
 Here Are the Steps to Follow:
- Remove any hanging chains or pendants
- Unscrew the finial from the bottom of the fitting
- Remove the cap and the globe-keeper
- Take off the glass housing
- Remove the individual bulbs
- Remove the screws on the bottom of the fan cap
- Disconnect the wires
- Tuck in the remaining wires back into the fitting
This is how to remove a ceiling fan light fixture – it’s that easy!
How to Remove a Bathroom Ceiling Fan
You need to start by removing the outer panel. This is usually a square-shaped grate that houses the internal parts of the fan.
Once the Outer Panel Has Been Removed, Follow These Steps:
- Remove the screw around the inside edge of the fitting
- Bend the little metal clips that are holding the fitting in place (use a screwdriver if you need to)
- Pop the part out – it should come easily
That’s how to remove a ceiling fan in your bathroom.
If you want to replace it, all you need to do is plug the new unit into the outlet that you see in one of the corners (under where the old unit was).
- How to Replace Bathroom Exhaust Fan Easy for Beginner
How to Safely Remove a Ceiling Fan
Safety is paramount when it comes to DIY at home. There often isn’t anybody around to help you out, and you might be tempted to go at it without the necessary protective gear.
You want to make certain that the power is shut off. It would be wise to use a tester on the wires to make sure there is no current at all.
Also, be aware of the ladder you’re using. It’s better to have someone around to hold it steady and to help you with lowering and supporting the fan unit.
Be careful around the glass cover and globes. Give them time to cool down if they’ve recently been used.
Take care when you’re lowering the fan and bear in mind that older fans might be brittle. They can break if you hold it wrong.
Keep all of these in mind throughout the removal or replacement process and you’ll be fine.
Final Thoughts
 That’s it for the guide! Well done for taking the time to learn how to remove a ceiling fan the right way.
It’ll become easier with a little practice.
You’ll be doing it on autopilot in no time.
All that left is for you to take what you’ve learned on how to remove a ceiling fan and put it into practice – you’ll be a master before you realize it!


