How to Build a Storage Shed from the Ground Up
How to Build a Storage Shed
I wish I had known how easy it is to learn how to build a storage shed at home! I used to think it was one of those super-projects taken on by one of the greatest DIY pros. Thankfully, I was wrong. I’m not a super-handy or practical person by nature – so if I can learn this, so can you.
Our guide will cover the steps you need to follow and give you some tips along the way. It’s not a super-deep guide, but it’s enough to get you started down the right path. By the end, we want you to be confident enough to get started. Whether that just means making plans or digging the foundation – what matters is that you start somewhere!
Let’s get into the guide.
Some Things to Think About Before Getting Started
Different cities have different rules regarding these types of projects. If you want to know how to build a shed plans free, you need to know the regulations surrounding it. It would be a good idea for you to pay a visit to your local authorities or the municipalities to make sure you don’t need any special permits.
In my city, anything smaller than 3.5m x 3.5m doesn’t require any permits. You also want to make sure that you plan according to your city, country, and climate.
For example, the area I live in is plagued with white ants. They eat wood crazy fast – so I had to plan and coat everything in repellant. You also want to make sure that it’s waterproofed. The last thing you want is rain destroying all your hard work!
P.S. This is a “How to build a shed free plans guide”, meaning you don’t need to draw up detailed plans (or hire anyone to do it for you). This can all be done by you, at home!
Step 1 – Get Digging
 This step is even more important if you’re learning how to build a large shed. You need to dig the hole for the foundation. There are a couple of things to think about:
- Dig far enough away from any trees and their root systems
- Inspect the dug-up ground for mole holes
- Decide on the size of the shed
You want to dig evenly, making sure it all stays level. I made channels around the edges for the cinder blocks to go. You’ll need to do this too – unless you’re going to lay concrete.
Step 2 – The Foundation Materials (and laying them)
 When you’re learning how to build a large shed from scratch, you need to get the foundation perfect. There are two foundation types here that you can choose from:
- Laying concrete
- Using cinder blocks and limestone filling
I chose cinder blocks, as I didn’t need to worry about rats and pets running around. You can also get some clay bricks to supplement the foundation. Make sure they stay above ground, or they’ll erode.
Here are some things to think about:
- Buy 15% more mortar than you think you’ll need
- Use any clay bricks above the ground
When you lay the foundation, make sure the channels along the side a filled with limestone screening. You’ll lay the electrical cables through here. Make sure you mark them with cautioning tape. Stick some rebar poles in the corners and connect them with a string. This will help you keep all the edges straight.
Step 3 – Preparing the Frame and the Roof
 The frames are even more important for learning how to build wood storage shed than it is for other types. Here are the materials you’ll likely need for this step:
- Heaps of 2×4 planks and the relevant nails
- Joist plates (they help connect two angled pieces of wood)
- A good quality saw for cutting
- The tiles you’ll use on the roof
- Know the dimensions you want the shed to have
This is the most important step for making sure the external structure is as stable as it can be. Spend the time you need to cut all the 2×4 planks. Cut a couple of extra ones in case you make some mistakes.
Step 4 – Making the Walls
 The height and width of the walls depend on the dimensions of your shed. When you’re learning how to build a storage shed, you need to plan the dimensions.
Use a framing hammer and the appropriate nails to connect the 2×4 planks. You’re just focusing on building the frames for now. The wall planks will be done later.
This is the stage where you’ll build the frame for the roof too. This part is more technical as you’ll need to use the joist plates to connect the angled pieces for the roof frame together.
Put each frame next to its final position and leave them there. You don’t want to get them mixed up, or back-to-front.
P.S. Make sure you plan for the windows on the sides or door frame.
Step 6 – Completing Your Foundation
 Make sure the electrical input is placed as close to where the first outlet will be. Place a conduit over the part that comes out the ground to keep it protected (it should be coming out the ground right next to one of the walls). The cinder blocks and bricks should have set in place by now. Here’s what you need to do:
- Fill the big enclosure with limestone aggregate
- Fill the spaces inside the cinder blocks and bricks too
- Use your body weight to flatten the limestone filling by jumping on it
- Aim to get it as flat and even as possible
- Once you’ve done this, get a sprinkler and set it over the whole foundation for around 45 minutes
- You might need to add some filling after the water has soaked in
The goal here is to get as much limestone into the spaces as possible. This will make your foundation very strong. Once this has set and dried, you’ll need some long I-bolts for creating the base frame.
You’ll heat these and bend them over to hold the frame in place. Hold the bolts in place in the concrete cinder blocks with loads of mortar.
You need to use 2x8s for the foundation frame. This is what the wall frame will be attached to.
Step 7 – Putting the Walls Frames Up
This is pretty simple compared to the other steps in this how to build a storage shed guide. You’ll attach the walls to the 2x8s used in the base frame.
Attach the walls before connecting them to the base. This will make sure they are perfectly squared up and well-fitted. After the frames are connected, then you can install the whole frame to the base.
Step 8 – Connecting the Roof Frame
 You’ll also need to create the roof trusses at this point. Use some shorter 2×4 planks to support the triangular shape of the roof (in addition to the joist plates). Here are a couple of pointers:
- Make sure the roof planks overshoot the side of the shed by at least 30cm
- Take your time to get the roof trusses perfectly planned and cut
- Do them one at a time, then put them all together before putting them on the shed
I’m going to stress how important it is to get the angles right. If you don’t make sure that the joists are cut and connected properly, the angles will give-in over time. This will eventually end up in the roof collapsing, or developing serious leaks.
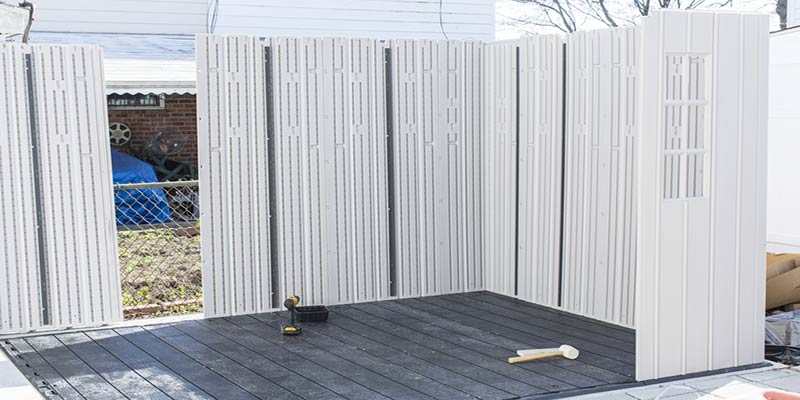
Step 9: Installing the Wall Boards and Siding
 This step should be pretty straightforward and quick. You can either use fake wallboards or thinner and broader planks for the walls. You’ll need to decide whether you want the wall planks to run vertically or horizontally.
I prefer vertically as I find them more resistant to water leaks. I used fake board and batten and I love the way it looks, along with being super-easy to install.
You can put some white trims on the corners of each wall to cover them up and make them look better. This is just a matter of personal preference though.
Step 10: Creating the Doors
This is probably the most technical and difficult to get right. You need to make sure that the tolerances are big enough.
Make them a little wider or longer than you think you need to. It’s easier to patch up the extra space than it is to fix if there isn’t enough space.
We won’t go into this part as it’s up to you to decide how you want the doors to work.
Step 11: Painting and Touching Up the Roof
 I wanted to see the wood grain, so I used party transparent paint.
This is totally up to you, and the results you want. You’ll need to decide what size boards.
So, you want to put on the roof, and what you’re going to coat them with.
If you aren’t sure, asphalt shingles are excellent and very durable.
Take your time to make sure that there aren’t any leaks or spaces in the roofing.
- Best Storage Sheds for Backyard
Final Thoughts
That’s it! Well done for taking up this challenge. With these instructions on how to build a storage shed, you’re ready to get out there and put them into practice – good luck!


