Our Guide on How to Use a Meat Slicer like a Professional

Using a Meat Slicer like a Professional
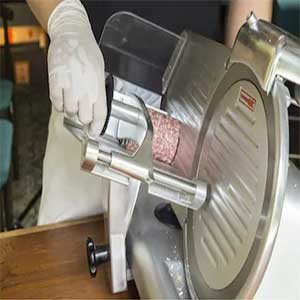 Our guide helps you get more by teaching you how to use a meat slicer as the pros do.
We’ll cover some of the basic techniques and safety pointers to help you get the best quality cuts – all while being as efficient as possible.
We want you to get the most value from your commercial, deli, or home meat slicer without having to go to a class.
With a little practice and patience, you’ll be slicing meat and cheese like a professional in no time!
Let’s get into the guide.
How to Use a Meat Slicer (Some General Tips)
Before we get into how to use the different types of meat slicers, we need to cover some tips and pointers that apply to all of them.
Here Are a Couple of Things that You Should Start Doing Right Away:
- Wash your hands in warm water with soap for 15-20 seconds before touching any meat or cheese
- Make sure the guard, the cutting blade and platform, and the storage platform are wiped down and disinfected before using
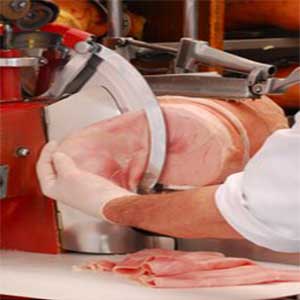
- Turkey should be cut horizontally, ham and beef should be cut vertically (long-ways)
- Always cut beef last to prevent cross-contamination
- Wrap up all cheese and meats units after you’ve cut them – date stamp them too to make sure they’re fresh in the future
- Never use a slicer to cut cooked meat after you’ve cut raw meat
- Always set the blade to zero (0) and unplug it at the wall when it’s not being used
If you keep these pointers in mind throughout the meat slicing process, you’ll get safer and better quality cuts.
Let’s move on to the guides.
How to Use a Commercial Meat Slicer
Make sure the blade, guard and meat storage platform are all sanitized and cleaned.
Remember that commercial meat slicers are far larger and more powerful than home meat slicers. This makes them far more dangerous too, so be extra careful when you’re near the power supply or the blade.
Here Are the Steps You Should Follow:
Step 1: Unpack the meat/cheese
Check the time or date stamp to make sure it’s still fresh. You should be in the habit of doing these types of checks anyway.
When you remove the packaging, drain the liquids that are inside the bag while it’s still on the cutting board. Completely remove the packaging.
Step 2: Place the meat or cheese on the slicing platform
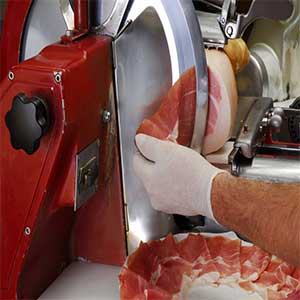 The orientation that it’s placed in depends on the meat or product being sliced.
Turkey is sliced side-to-side, whereas ham and beef are sliced end-to-end.
Side-to-side refers to the slicing along the longest side of the meat. End-to-end means you need to slice the shorter sides.
Cheese should also be sliced on its shortest side.
Step 4: Lock the guard in place
Once the meat is in the correct orientation and position, lock it in place with the meat guard or the right-hand side of the slicer. It’s the movable unit with the spikey plate that holds the meat in place and stops it from turning while being cut.
Step 5: Preparing to slice
Make sure the sliding mechanism is set fully forward and ready to push the meat. You need to set the blade to zero (0) so that you don’t accidentally cut anything. Find the “On” switch and turn it on. It’s usually a blinking green light.
Step 6: Performing the slicing
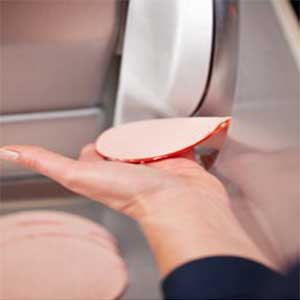 By this step, the product should be held in place on the slicer and the machine should be turned on. Set the blade to the appropriate thickness for the slicing.
Your right hand should be on the pushing mechanism. Steadily push the product into the slicing blade and catch the individual slices with your left hand.
After catching a couple of slices, quickly place the sliced product on the platform under your left hand. Try to get into a slicing rhythm, or you won’t get very consistent cuts.
Step 7: Remove the sliced product
Once you’re done cutting, set the pushing mechanism back into its neutral position and switch off the machine. Set the blade to zero (0) and loosen the meat guard.
Remove the unsliced meat and repackage it, making sure to mark the date and time for future reference. Take the sliced meat and place it in its dish or packaging.
Step 8: Cleaning the meat slicer
 This is one of the most important and frequently overlooked steps when learning how to use a meat slicer.
You need to give the machine a thorough cleaning, especially if you’re cutting with beef.
You don’t have to give as deep a clean between slicing turkey and ham, but this isn’t true for beef and cheese. Make sure to sanitize and completely remove all meat and cheese residue before cutting other meat. Focus on cleaning the meat guard, sliding platform, slicing blade, housing platform, and your hands.
How to Use a Deli Slicer
The good news is that you don’t need to learn a whole new process for these meat slicers. Deli slicers are often the same as professional and commercial meat slicers. The name differs depending on where you live and where you bought the slicer from.
The steps that we followed for how to use a commercial meat slicer will also work when learning how to use a deli slicer. There might be a few minor differences in sizes and how far the blade can be adjusted, but these won’t affect how you follow the steps.
Just make sure that you keep the slicer as clean as possible and use it as carefully as possible. There’s a bit of a learning curve, but you’ll get the hang of it soon enough.
How to Use a Meat Slicer at Home
Before starting, make sure the slicer is clean and you have the appropriate protective gloves. Here are the steps you need to follow when using a meat slicer at home:
Step 1: Pull the carriage towards you
Pull the carriage to the furthest end of its slide (towards you) and open the meat guard.
Step 2: Place and secure the meat
Place the meat inside the carriage and secure it well with the meat guard. Make sure the meat guard is locked in place and isn’t loose.
Step 3: Set the thickness of the cut
Use the dial to select the position of the slicing blade and set it to the appropriate thickness. Plugin the power cable to the outlet and turn on the machine.
Step 4: Perform the cuts
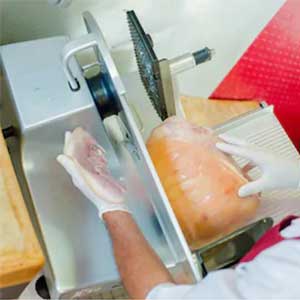 Make sure you never cut with both hands. The pushing handle is almost always on the right-hand side, so you’ll need to push with your right hand.
Catch the sliced meat in your left hand and place it on the platform. Some home slicers won’t need you to catch the sliced meat. If that’s the case, just let it fall to the platform.
Check frequently to make sure that the sliced meat isn’t building up too high on the platform. You don’t want it to catch in the blade.
Step 6: Turn the machine off
Once you’re finished the slicing, turn the machine off and unplug it from the power outlet. Wait for the blade to stop spinning by itself. Never try to stop it manually! Once the blade has stopped, use the dial to set the thickness to zero (0).
Step 7: Clean the machine
If you have cut resistant gloves, you’ll want to use them here. Pull the carriage away from the blade. Unscrew the black-handled screw and remove the carriage from the unit.
Some machines will lock into place, so all you’ll need to do is lift the carriage off. Wash the carriage with warm water and soap in a deep sink.
Sanitize it after washing. Use a squirting bottle with some soapy water to clean the rest of the unit. Sanitize it afterward. Make sure to take the blade apart and give it a thorough cleaning.
- Best Meat Slicer to Get Your Hands
Final Thoughts
Now that you know how to use a meat slicer machine, you’re ready to cut the best quality cuts – whether you’re at work or home. You have a full understanding of the best process to follow to get high-quality results.
All that’s left is for you to put what you’ve learned into practice. It’ll take a little time, but you’ll get into a rhythm and be able to do this all from muscle memory in no time.
Take what you’ve learned on how to use a meat slicer and use it to get the professional quality results!


